Entradas

36. Using Cl@ve (IV). TroubleShoting

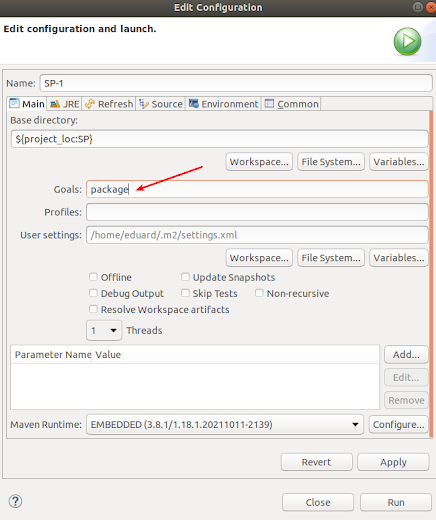
 1. When copying the jars from the kit folder to the Tomcat lib folder, remember to remove the prefix "00_" to the jars and the version of the serializar.jar 2. The environment variable must be exported as (don't forget the last "/"): export CLAVE_SP2_CONFIG_REPOSITORY=/home/ximo/CLAVE20_CONF/SP/ 3. Verify that the environment variable is set: env | grep SP 4. The <url>tag  in the <repositories>tag in the pom.xml of the project should be <repositories> <repository> <id> repoDependencias </id> <name> repoDependencias </name> <!-- <url>file://Dependencias</url> --> <url> file:///home/ximo/WORKSPACES/WS_CLAVE20/SP/Dependencias </url> </repository> </repositories> 5. If you are not a recognized "Service Provider" with your "certificate", you won't be able to test the services. So when you get the cert

35. Using Cl@ve (III). Deploying to Tomcat

Imagen
1. Start up Tomcat Go to the folder  /home/ximo/MyPrograms/apache-tomcat-8.5.73/ bin   and execute  ./startup.sh  to test if tomcat runs, with chrome pointing to the url http://localhost:8080 and click Manager App  Type tomcat and tomcat  as you defiend in the users.xml file in the conf folder of Tomcat And the application manager is displayed 2. Deploy the file SP2.war to Tomcat 1. Copy the SP2.war file from the folder /home/eduard/WORKSPACES/WS_CLAVE20/SP/target to the Tomcat folder: /home/ximo/MyPrograms/apache-tomcat-8.5.73/ webapps   2. Refresh the browser and the SP2 application will be displayed in the application manager Press the "Arrancar" button and should work

34. Using Cl@ve (II). Using Eclipse

Imagen
 0. Introduction Any mention to "ximo", should be replaced by an existing user name Make sure you have followed all the required steps in the previous post 1. Rename the folder  1. Create a folder (for storing the Eclipse workspace): /home/ximo/ WORKSPACES/WS_CLAVE20 2. Copy the folder   /home/ximo/CLAVE20/Curso Tecnico Cl-ve 2/kit/Paquete de Integracion Java 8 2-0-2/ Paquete_Integracion_Java_Clave_2_0 into  /home/ximo/WORKSPACES/ WS_CLAVE20 3. Go to the /home/ximo/WORKSPACES/WS_CLAVE20 and rename the folder name  Paquete_Integracion_Java_Clave_2_0 to SP  2. Open Eclipse and select a jdk 1.8.xx 1. Download a jdk 1.8. xx(you can use  adopt ) (for instance in the folder /home/ximo/MyPrograms) 2. Uncompress the file 3. In Eclipse select this jdk Window-> Preferences -> Java -> Installed JREs   and s elect the folder where the JDK is Apply and Close 3. Import the project to the Workspace 1. Switch to the workspace  /home/ximo/WORKSPACES/ WS_CLAVE20 File -> Switch wor

33. Using Cl@ve (I). First steps

Imagen
0. Introduction Any mention to "ximo", should be replaced by an existing user name 1. Install Apache Tomcat 8.5.xx 2. Download the course and demo zip file 3. Copy the Keystore and configuration 4. Copy required libraries to Tomcat form the kit folder 5. 1. Install Apache Tomcat 8.5.xx 1. Download Apache Tomcat 8.5.xx (for instance in the folder /home/ximo/MyPrograms) 2. Unzip it (for instance you get /home/ximo/MyPrograms/apache-tomcat-8.5.73 folder) 3. Open the file: /home/ximo/MyPrograms/apache-tomcat-8.5.73/conf/ tomcat-users.xml And add the following line just before </tomcat-users> <user username="tomcat" password="tomcat" roles="manager-gui"/> 4. Go to the folder  /home/ximo/MyPrograms/apache-tomcat-8.5.73/ bin   and execute  ./startup.sh  to test if tomcat runs, with chrome pointing to the url http://localhost:8080 2. Download the course and demo zip file Create a folder for storing the file to download /home/ximo/CLAVE20 Down

32. INE, WS, Codigos Postales

Muchos Web Services de Sedipualpa requieren que se pongan direcciones cuya codificación y nomenclatura se adapte al INE. Por contra la información de la que se parte procedente de otras fuentes pueden contener el código postal y nombre del municipio y no el código INE. Pues bien, Pablo Barrachina aporta un valiosísimo fichero junto con las pertinentes indicaciones para obtenerlo en su web  y su enlace a la web el INE . Ahora solo falta como capturar esa información a Postgres y si hace falta conversión alguna de codificación. Para ello esta pregunta de stackoverflow puede ser interesante. Para incorporar este fichero a Postgres (tras quitar algunos registrso duplicados) he utilizado copy ine.codigopostal (codi_prov, codi_muni, cp, municipio) FROM '/home/informatica/Downloads/FicheroRelacion_INE_CodigoPostal.csv' DELIMITER ';' NULL AS ' ' CSV header encoding 'latin1' ;

31. SEFACE

Imagen
 1. Introducción Veamos el menú  La idea es registrar una factura y ver si hay errores y actuar en cosecuencia. Los avisos indican la metodología a seguir. En princiio las facturas deberían de entrar en registro SERES, y se deben enviar al departamento correspondiente (?)  2. Roles de SEFACE y proceso general Si entramos en administración y queremos asisgnar un rol de SEFACE, vemos que hay varios roles específicos: 1. ROL:  Gestión de facturas : Permite verificar las facturas que acaban de entrar de FACE. Le damos a la opcion de facturas pendientes de verificar En rojo aparecen los errores. Con ek boton con "M" podemos mostrar los datos, y con el botón "E"se puede editar algo que no esté bien,Si ahora marcamos una factura, cambia el menú Ahora toca revisar la factura  con el rol: 2. ROL: Revisión de facturas : Permite verificar las facturas que acaban de entrar de FACE. Le damos a la opcion de  facturas pendientes de revisar 3: ROL  Autorizado Contratación : Autoriz

30. Fiscalización previa limitada. SECOIN

Imagen
 1. Introducción Hay que tener el rol de fiscalizador (o interventor) Hay 4 opciones: Formularios (disponible para cada expediente) Fiscalizaciones (que hay en marcha o se han hecho) Áreas (áreas, expedientes, actuaciones) Reparos (gestión de reparos) La fiscalización previa limitada consiste en aprovar una serie de fichas de fiscalización por fichas para ver si el expediente tiene ese contenido. 2. Formularios Sirven para indicar para un tipo de expediente concreto. Por ejemplo para el formulario de aprobación de convocatoria de personal interino (fase A), le damos al botón de ver Vemos que hay unos requisitos catalogados; Si abrimos la pestaña de requisitos básicos, aparecen un montón ...   Si abrimos la de requisitos adicionales Se puede editar la ficha, pero a continuación la debes aprobar por pleno (?) . También para cada ficha se pueden ver las fiscalizaciones que hay aplicadas 3. Nueva Fiscalización Se le da al botón de nueva fiscalización y seleccionamos un expediente y buscam